

General Outline of Procedures in the Examination of Tissues
There are several ways and techniques used to process
tissues for laboratory examination with the intent of making accurate and
proper diagnosis. Whichever technique is employed, there are factors which
govern the whole procedure: the structures to be studied, the size and nature
of the tissue, whether the specimen is fresh or preserved. and the urgency of
the examination. Details of each stage of the investigation may differ from
laboratory to laboratory but the basic principles remain the same.
RECEPTION
On arrival in the departmental reception, the specimen is
checked at the earliest opportunity for the following:
1. That the specimen is for histological examination.
2. That the container is clearly labeled and accompanied by
a completed request form.
3. That sufficient fixative is in the container, or if the
specimen is not in fixative or is in a wrong fluid.
The request form is dated and stamped; the specimen is given
an identification serial number which remains with the specimen until all the
investigations have been carried out. The pathologist, usually at a set time,
will examine the specimen, where necessary describe the macroscopic appearance
and select the pieces from which he wants the section to be prepared. A sink
and running water are essential in this area usually referred to as the 'cut-up
room'.
The pathologist requires rubber gloves, sponge, scalpel and scalpel
blades, large ham knife, plain and rat-tooth forceps, probes, scissors, bowel
scissors, small bone saw, steel rule and some means of weighing the specimen.
It is very important for the laboratory scientist assigned to the cut-up room
to write the description of the specimen and record how many pieces are taken
for processing.
FRESH SPECIMEN
Fresh specimens sent to the laboratory for histological
examination are prepared as either squash or teased preparation, touch or
frozen sections.
Squash preparation
Small pieces of tissues not more than 1 mm in diameter are placed in the centre
of a microscope slide; a cover slip is forcibly pressed down on them. Vital
staining can be done by placing a drop of the stain at the junction of the
slide and the cover slip. The stain is drawn in by capillary action and
absorbed by the tissues. The purpose of squash preparation is to study the
cellular contents of the tissue.
Teased preparation
The fresh specimen of tissue, immersed in saline or Ringer's solution, is
dissected with mounted needles. Pieces of the tissue are picked onto a
microscope slide and mounted as a wet preparation under a coverslip. The slide
is then examined by the ordinary light microscope or better still by phase
contrast microscope. Stains like methylene blue can be applied to enhance the
recognition of cellular structures. This method allows cells to be examined in
living state. A big drawback is that it is not a permanent preparation.
Smear Smearing a
piece of fresh specimen of tissue evenly on the surface of microscope slide is an acceptable practice in
histopathology. The making of such smears however, depends on the type of
tissue to be examined. The smear can be examined fresh in which case it is
stained as for teased preparation or by using supravital stain in conjunction
with a warm stage. The preparation is never permanent.
Impression smears
these are prepared by touching a freshly cut piece of tissue with the surface
of clean microscope slide. This way, cells are transferred and adhere to the
slide. The smear can be examined with the phase contrast microscope or by using
vital stain. It is also possible to fix the smear and stain accordingly.
Frozen sections
Fresh tissue frozen on a microtome with CO, can be cut into sections of about
10-15 um in thickness. The sections are transferred to a dish and attached onto
the slide before staining or from the dish carried on a glass rod through
staining solutions.
FIXED TISSUES
To study normal or diseased tissues microscopically, thin
sections of the tissue have to be cut. Sections are normally prepared from
fixed tissues. Tissues are fixed to prevent putrefaction and other post mortem
changes which occur soon after removal from the body. The choice of fixative
depends to a large extent on the type of investigation,nature of the specimen,
urgency of the examination and whether or not serial sections are required.
PARAFFIN SECTIONS
The most popular embedding medium for histological
preparations is the paraffin wax. The embedding medium confers rigidity to the
piece of tissue so that sections can be cut. The selected fixed pieces of
tissue are first passed through a series of baths of alcohol to remove water
from the tissues (dehydration).
This is done because the fixative is not
miscible with paraffin wax. The tissues are passed further to a bath or two of
a medium that is miscible with alcohol and paraffin. This medium is the
clearing agent. The clearing medium also raises the refractive index of the
tissue, making it look transparent. It is this clearing medium that is
eventually replaced by the molten paraffin wax. When the tissues have been
sufficiently impregnated, they are embedded in fresh wax which solidifies on
cooling. It should be noted that workers refer to clearing agents as ante-media
because some of them don't actually clear the tissue. Using paraffin wax allows
thin and serial sections to be cut easily, allows many staining techniques and
facilitates handling and storage.
Celloidin Next to
paraffin wax, celloidin is a commonly used embedding medium. Celloidin is a
purified form of nitro-cellulose which is soluble in many solvents. Celloidin
allows thicker sections to be cut and that makes it very useful in the study of
central nervous system. It is a better medium for very hard tissues or tissues
with varying consistency. It causes little or no shrinkage. However, it is a
very slow method and serial sections are very difficult to produce. A variety
of celloidin, the low viscosity nitro-cellulose (LVN) is also very popular. The
LVN dissolves more easily and permits thinner sections to be cut.
Resin embedding
This is a new method adopted for light microscopy from electron microscopy
techniques. The major advantage of using resins is that much thinner sections
can be cut though specially adapted knives and microtomes are required. The
various stages of dehydration, clearing and embedding are referred to as
processing and are usually done manually or by automatic processing machine.
CUTTING AND STAINING
Sections are cut with the microtome from the paraffin wax blocks.
The microtome is a most useful piece of equipment in the histopathology
laboratory and the microtome is as good as its knife. The different types of
microtome are discussed later in this section. The cut sections are floated out
in warm water, mounted on clean microscope slides, dried and then stained. The
stained sections are mounted in a good mountant under a coverglass, then
labelled and cross-checked against the information on the request form.
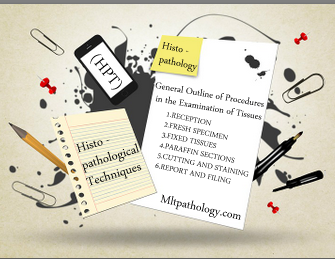 REPORT AND FILING
After examining the slides, the pathologist writes his
report which is passed on to the secretary for typing and dispatch. In most
cases the pathologist may require additional sections to be cut or special
staining techniques to be carried out before making a final report. The slides
are dried at 37°C for about two weeks and then filed away. The gross specimen
is kept for at least one month before it is finally disposed off.
This is a general outline of the procedures of processing a
histopathological specimen. It should always be clearly borne in mind to handle
surgical specimens with utmost care because it is not always possible to repeat
the sample.


If you have any queries related medical laboratory science & you are looking for any topic which you have have not found here.. you can comment below... and feedback us if you like over work & Theory
.
Thanks for coming here..